Imagine walking into your entryway and seeing your company logo shining beneath a glossy, glass‑like surface. Or picture your home gym floor featuring a dynamic geometric pattern that never fades. Custom epoxy floor graphics let you turn plain concrete or wood into a lasting work of art. In this detailed guide, you’ll discover why epoxy is the perfect medium, how to plan your design, and the exact step‑by‑step process to embed images, logos, and patterns into your floor for a durable, professional finish.
Why Epoxy Is Ideal for Custom Graphics
Epoxy resin offers several advantages that make it uniquely suited for showcasing embedded designs:
- Crystal‑Clear Finish: High‑quality epoxy cures to a transparent, glass‑like surface that magnifies and protects the artwork beneath.
- Extreme Durability: Once cured, epoxy resists scratches, stains, moisture, and heavy traffic—perfect for busy homes or commercial spaces.
- Chemical Bonding: Epoxy forms a strong chemical bond with concrete, wood, or other substrates, ensuring your graphic won’t peel or lift.
- Depth and Dimension: Layers of epoxy add depth, making your graphic appear three‑dimensional.
These qualities mean your custom floor graphic isn’t just painted on; it’s sealed into the floor itself.
Planning Your Design
Before you begin any application, a clear plan is essential.
1. Choose Your Artwork
- Digital File Format: Use high‑resolution images or vector files (SVG, AI) for crisp lines.
- Simplicity: Bold shapes and clear contrasts translate best; ultra‑fine details can blur under thick resin.
2. Determine Scale and Placement
- Measure the Floor Area: Use a tape measure to record length and width.
- Create a Template: Sketch a to‑scale drawing on paper or in a simple graphics program.
- Mock‑Up on the Floor: Use low‑tack painter’s tape to outline the design area so you can visualize it in place.
3. Select Colors and Layers
- Clear vs. Tinted Epoxy: Choose clear for a window‑like effect or lightly tinted epoxy for a colored glaze.
- Pigments and Flakes: Decide if you want colored flakes or pigments mixed into the epoxy layers for extra flair.
Materials & Tools You’ll Need
- Two‑Part Epoxy Resin System (clear, UV‑resistant, floor‑grade)
- Matching Hardener
- High‑Resolution Vinyl Graphic or Stencil
- Epoxy Pigments or Metallic Powders (optional)
- Primer (Epoxy or Concrete)
- Concrete Degreaser or TSP
- Concrete Grinder or Acid Etch Kit (for profiling)
- Mixing Buckets & Drill‑Mounted Mixing Paddle
- Notched Squeegee or Gauge Rake
- Spiked Roller (to eliminate bubbles)
- Angled and Flat Brushes
- Microfiber Roller with ⅜” Nap
- Painter’s Tape and Drop Cloths
- Safety Gear: Gloves, goggles, respirator rated for organic vapors, knee pads
Step‑by‑Step Application Process
Step 1: Prepare & Clean the Floor
- Clear the Area: Remove all furniture, rugs, and debris.
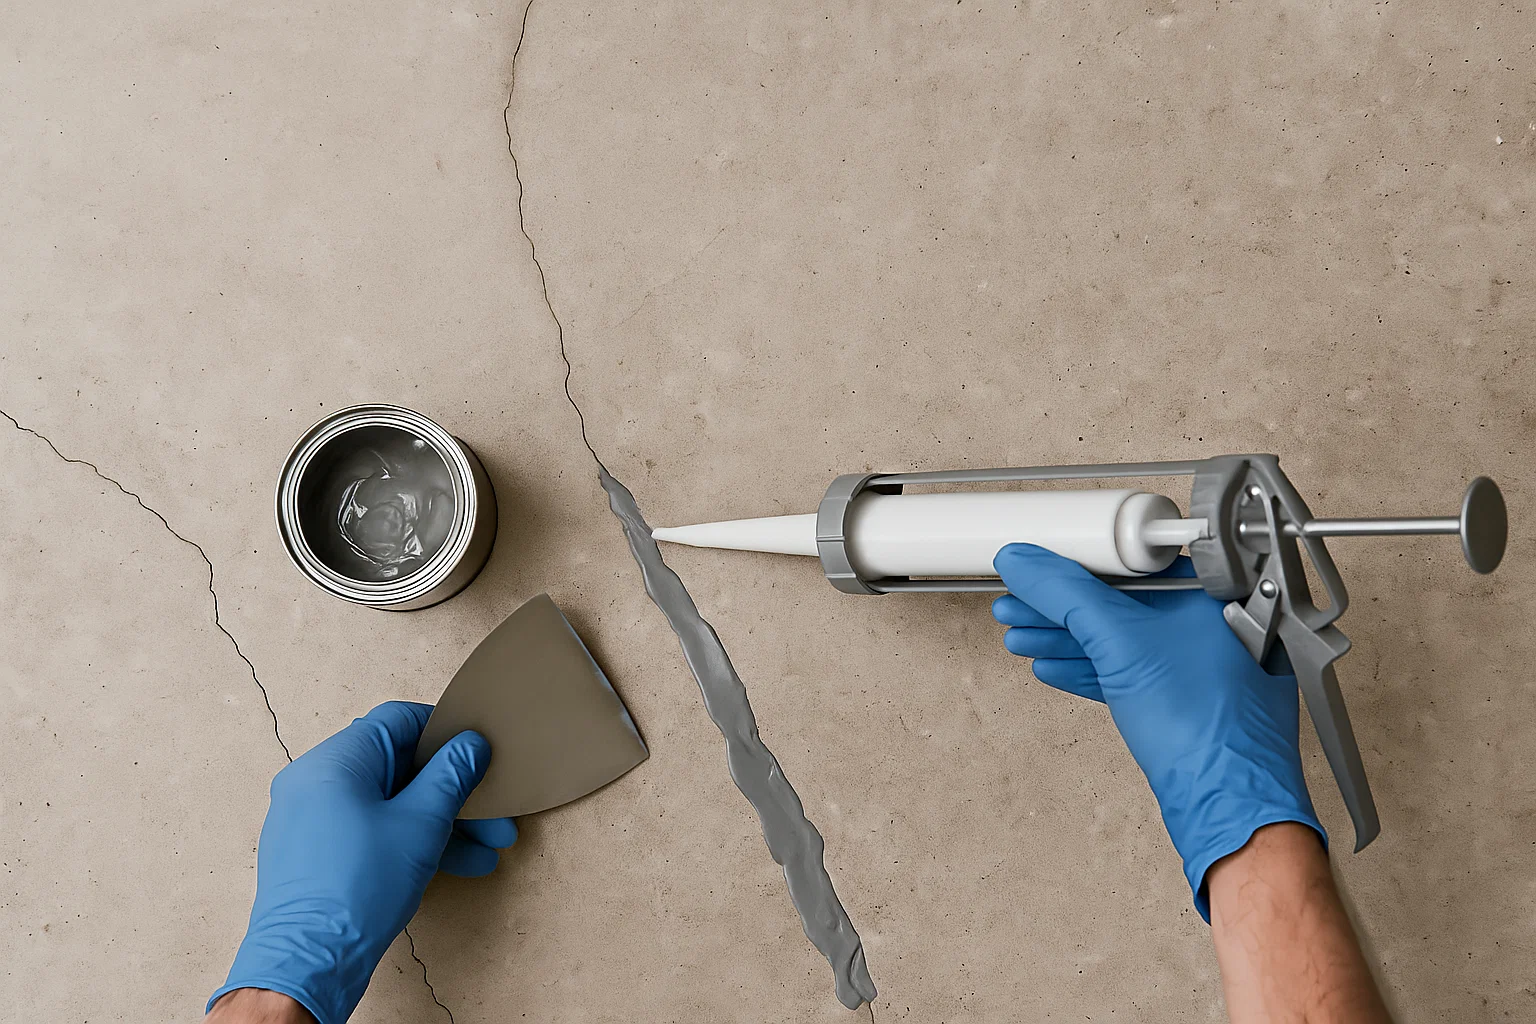
- Degrease: Scrub the floor with a TSP solution to remove oils and dirt. Rinse thoroughly and let dry for 24 hours.
- Repair Cracks: Fill any pits or cracks with a compatible patch compound. Sand smooth when dry.
Step 2: Profile the Surface
- Mechanical Grinding: Use a concrete grinder or
- Acid Etching: Follow the acid‑etch kit instructions.
- Dust Removal: Vacuum and wipe with a tack cloth until completely clean.
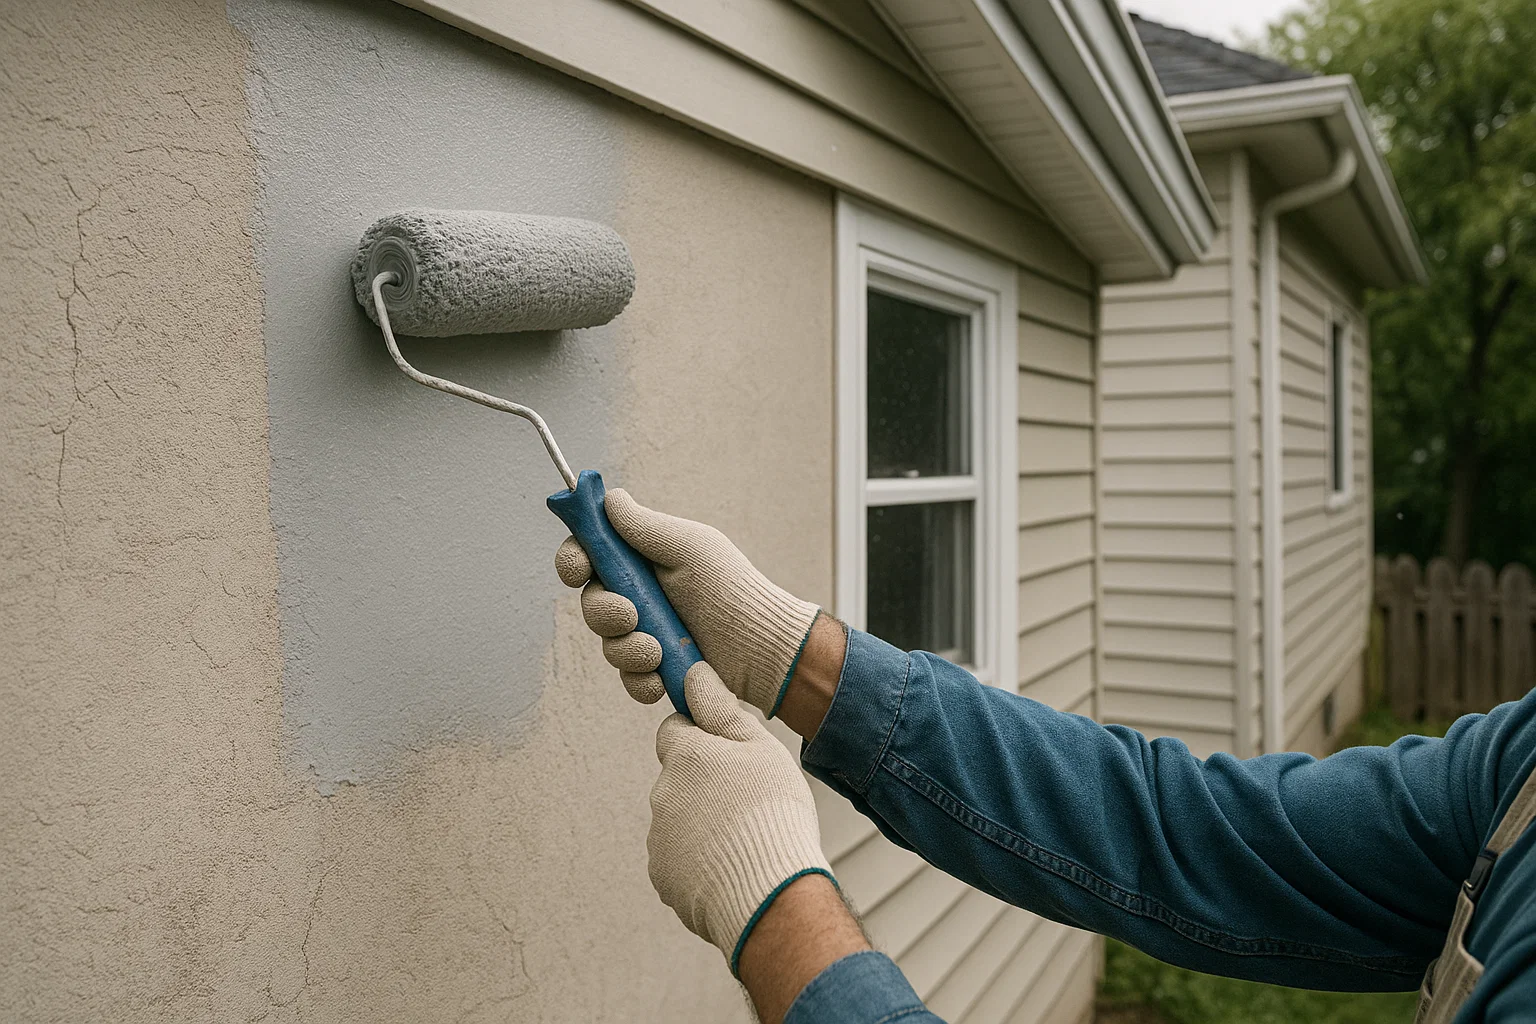
Step 3: Apply Primer/Basecoat
- Mix Primer: Combine primer resin and hardener at the exact ratio.
- Roll Primer: Using a microfiber roller, apply a thin, even coat, working from farthest corner to the exit.
- Tack Time: Wait 2–4 hours until the primer is tacky but not fully hard.
Step 4: Position Your Graphic
- Lay Out the Vinyl or Stencil: Carefully align it within your taped outline.
- Smooth it Down: Use a squeegee or firm hand pressure to press out any bubbles or wrinkles.
- Tape Edges: Secure with painter’s tape to keep the graphic from shifting.
Step 5: Mix & Pour the First Epoxy Coat
- Stir Slowly: Mix resin and hardener gently to reduce air bubbles.
- Pour Epoxy: In ribbon form along one edge, then
- Spread Evenly: Use a notched squeegee or gauge rake to achieve 1/16–1/8″ thickness.
- Spike Roll: Immediately roll a spiked roller to pop bubbles and level the surface.
Step 6: Build Depth with Additional Coats (Optional)
- Tacky Time: After 4–6 hours, when the first coat is firm‑tacky,
- Light Sanding: Gently sand with 220‑grit paper to give the next coat some tooth.
- Second Pour: Repeat pour, spread, and spike roll for a deeper, clearer appearance. Two to three coats are recommended for best results.
Step 7: Final Cure & Inspection
- Keep Dust Out: Maintain a clean environment for 48–72 hours.
- Light Traffic: Safe after 48 hours; full chemical cure in 7 days.
- Inspect & Touch Up: Sand and apply small epoxy droplets to any visible blemishes.
Maintenance Tips
- Sweep or Vacuum Regularly: Remove grit that could scratch the surface.
- Damp Mop with pH‑Neutral Cleaner: Avoid harsh chemicals that can dull epoxy.
- Use Floor Pads or Rugs: In high‑traffic zones, place washable mats to protect the finish.
- Store Leftover Epoxy: Keep a small container of mixed epoxy for future spot repairs.
Inspiring Applications
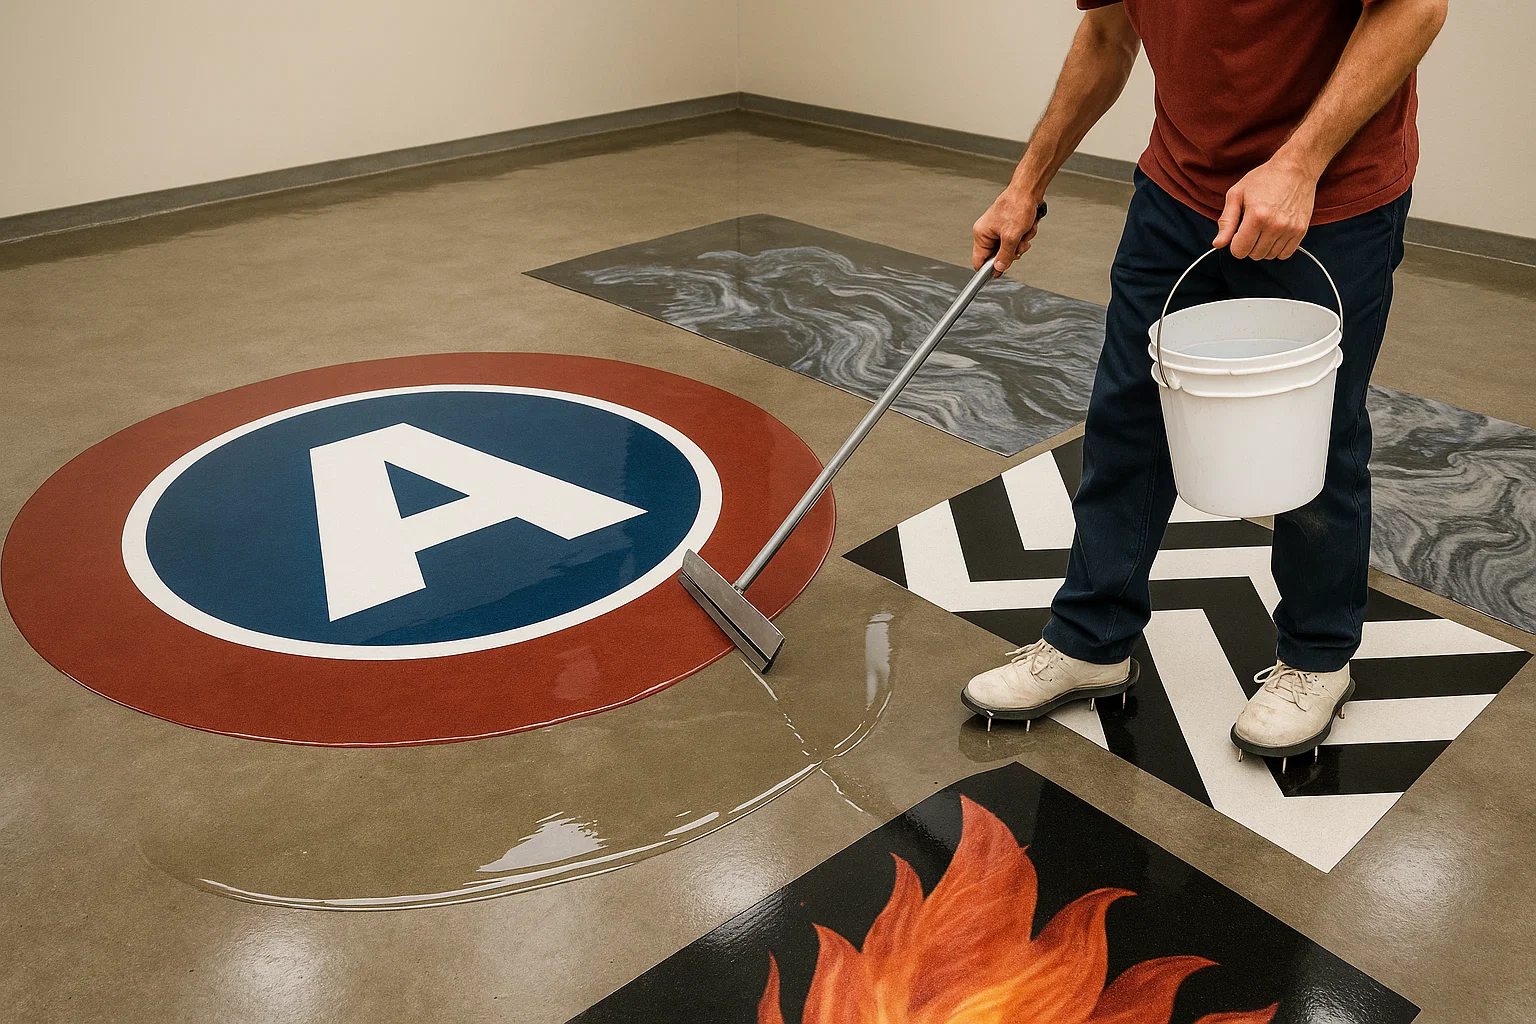
- Home Gym Branding: Your logo underfoot adds motivation and professionalism.
- Retail Store Floors: Embed sale graphics or store logos for a unique shopping experience.
- Children’s Playrooms: Under-epoxy decals of alphabets or animals that are tough and washable.
- Office Lobbies: Company name or core values displayed boldly on the lobby floor.
Conclusion
Embedding custom graphics in epoxy floors transforms ordinary surfaces into striking, durable canvases. By following these clear, step‑by‑step instructions—surface prep, priming, graphic placement, epoxy pouring, and curing—you’ll achieve a flawless, long‑lasting finish. Whether it’s a bold logo, an intricate pattern, or playful artwork, your floor will withstand daily wear while making a memorable statement. Ready to bring your design to life? Gather your materials, plan carefully, and get started on an epoxy project that showcases your creativity at its best.